# User Guide
# LED Indicator Guide
From v1.8.0 and after
- First Led: Power
- Second Led: Network
- Third Led: Broker connection
- Fourth Led: Operations
# Steady Yellow third Led
The bridge is generating an Access Point for network onboarding.
# Blinking Orange third Led
The bridge is disconnected from the MQTT broker.
# Blinking Orange second Led
The bridge is disconnected from the network.
# Steady Green third Led
The bridge is connected to both the network and the MQTT broker.
# Blue fourth Led
An update or operation is currently in progress.
# Blinking purple fourth Led
Over the Air update in progress
Before v1.8.0
# Steady Orange
The bridge is generating an Access Point for network onboarding.
# Orange (5 seconds on, 5 seconds off)
The bridge is disconnected from the MQTT broker.
# Orange (2 seconds on, 2 seconds off)
The bridge is disconnected from the WiFi network.
# Steady Green
The bridge is connected to both the network and the MQTT broker.
# Steady Blue
An update or operation is currently in progress.
# Flashing Blue
Scanning or communication is in progress.
# Modules and Parameters
# Home Assistant Discovery Convention
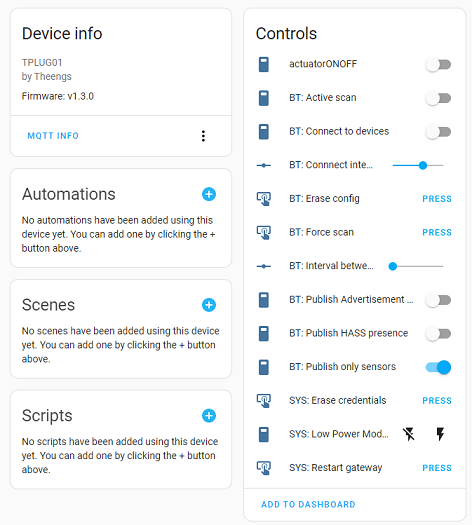
The bridge publishes its configuration and detected BLE sensors to the broker following the Home Assistant discovery convention (opens new window). You can find the devices in the Configuration->Devices menu with Home Assistant (opens new window).


TIP
Other controllers can also use the Home Assistant convention for automatic discovery.
# Bluetooth Gateway
The bridge detects Bluetooth devices (opens new window) and publishes their data to the MQTT broker.
home/112233445566/BTtoMQTT/AABBCCDDEEFF
{"id":"AA:BB:CC:DD:EE:FF","rssi":-88,"brand":"ClearGrass/Qingping","model":"Alarm Clock","model_id":"CGC1/CGD1","tempc":20.3,"tempf":68.54,"hum":55.3,"batt":41}
2
For example with auto-discovery

# Default parameters
- Adaptive scanning activated (from v1.5.0)
- Connect to BLE devices deactivated
- BLE adaptive scan activated
The BLE parameters can be changed with the commands detailed into BLE gateway usage (opens new window).
# Erasing Theengs Bridge configuration
If connected to an MQTT broker, the bridge configuration can be erased with an MQTT command (opens new window) or the button available in HA "SYS: Erase credentials". If not connected to an MQTT broker you can reset the board by following the procedure below:
- Connect the bridge to your computer with a USB cable
- Go to the upload portal (opens new window)
- Select "theengs-bridge" if you have TBRIDGE01 and "theengs-bridge-v11" if you have TBRIDGE02, and keep "Erase Flash" selected
- Click on INSTALL, and wait a few minutes
- The bridge will have now the latest version and the settings erased
# Updating Theengs Bridge
Theengs bridge can benefit from updates following these different methods:
# For v1.8.0 and after
- From Home Assistant directly, Settings->Devices & Services->Devices, click on the bridge, click on the firmware version, click Update
- From an MQTT command to trigger the download of the firmware from a webserver
- Connect to your MQTT broker with a client like MQTT Explorer
- Publish the update command like below (OTAPASSWORD being your Over The Air password if you changed it during the configuration):
{
  "version": "latest"
}
2
3
To this topic (112233445566 being your gateway_name):
home/112233445566/commands/MQTTtoSYS/firmware_update
- The bridge will restart with the new version
# For all versions
- By connecting to your computer with a USB cable
- Go to the upload portal (opens new window)
- Select "theengs-bridge" if you have TBRIDGE01, 'theengs-bridge-v11" if you have TBRIDGE02, and unselect "Erase Flash" to keep your parameters
- Click on INSTALL, and wait a few minutes
- The bridge will have now the latest version
- From the WifiManager portal, by uploading a binary directly to the bridge
- Download the last version binary named "Theengs-Bridge-firmware" from the Github release page of OpenMQTTGateway (opens new window)
- Connect to the Wifi access point with your smartphone
- Click Update
- Add the binary downloaded previously
- Click Update and wait a few minutes until you get "Update successfull"
- Reconfigure the bridge into the Wifi portal